
Moving Shadows with Grease Pencil in Blender 3D - Tutorial & Free Download
Hey everyone, it’s Kevin welcome back to the channel! In this video, I’m going to show you how to create these moving shadows with Grease Pencil in Blender 3D.
Now, if you don’t know what grease pencil is, it’s an Object in Blender that allows you to draw 2D directly in the 3D Viewport. This makes it pretty awesome for creating some 2D/3D hybrid art. I have a few resource videos and a course on this so if you want more info, you can find it in my channel playlist.
When making this video, I actually wasn’t sure what to title it since this seems like such a specific use case. But I think the technique used here can be a applied to whatever your needs may be. I made these 2 social media posts last year where I was demonstrating shadow experiments on these plants. These were part of my 2D/3D dream office scene that I made and if you want to check out the full breakdown, I’ll leave a link below.
I drew the plants with grease pencil, on layers in varying Z space. And I was trying to have the front leaves cast a sort of shadow on the leaves underneath them. I wanted those shadows to be in the same Z space as the underlying leaves while also mimicking the movement of the front leaf that was “casting” it. This was done primarily using masks and modifiers.
I’ll be walking through that process using this project file. I’ll have this available on my gumroad for free, which will include a start and end file in case you want to follow along.
Download File: https://kevandram.gumroad.com/l/movingshadows
Process
Here I have this peace lily drawn with grease pencil sitting in a mesh pot. Going to the object data properties tab, you’ll notice I’ve separated the leaves into layers. Although this seems like a lot, I’ve named them according to where they are in Z space. Side note, I do think they are working on a layer grouping system for later release. But, for now, for readability, I’ve numbered them to easily identify them. The layers with the 0 in front are actually just this front leaf as I’ll be using this for the tutorial. The ones with 1 in front are the others in the same Z space, and the ones with 2 in front are the ones right behind it, et cetera. All of them are comprised the same way, so I have a Fill Layer, an Add Layer on top of the Fill Layer, and then the Outline. Additionally some of them have a stem layer, but for the most part, they have the same structure.
Animating the Movement
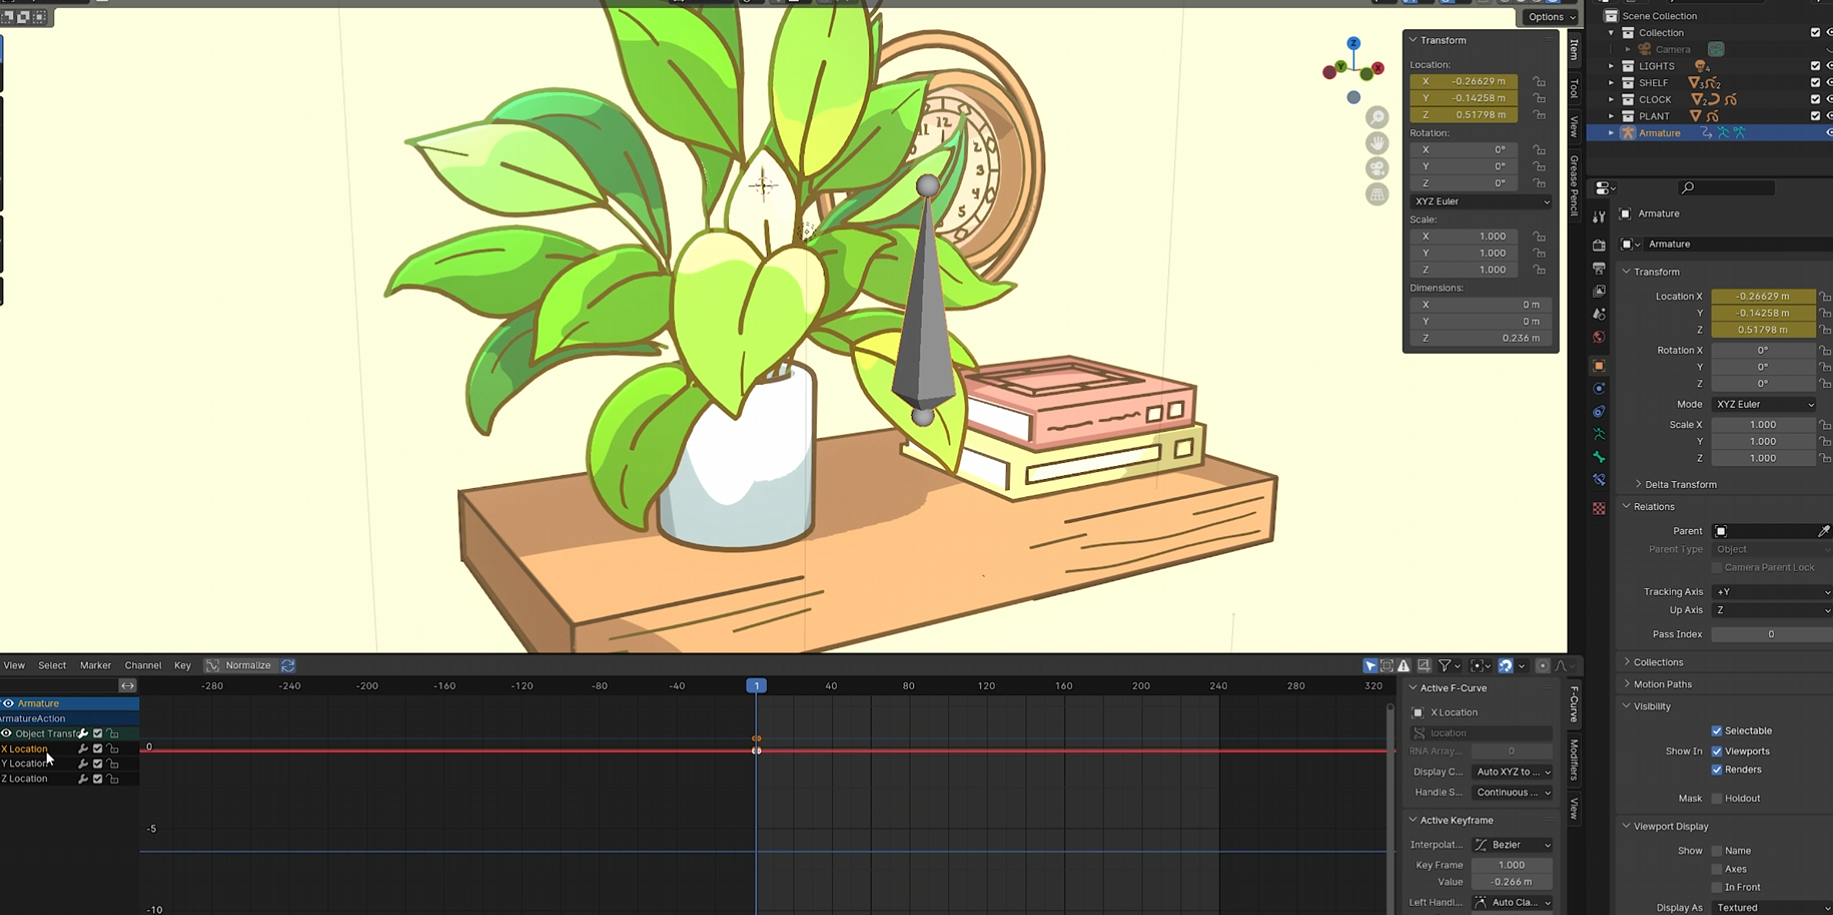
So, I want to move this front leaf here, the one on layers 0, and then have it cast a shadow on the layers behind it. We’ll start with moving it using modifiers. Click on the plant object and hit CTRL + A to Apply Rotation and Scale, making sure these values are 0 and 1 respectively. Then, Right Click to set the Origin Point to the Geometry. Hit Shift + S to move the 3D Cursor to it. And hit Shift + A to bring in an armature object. I’ll size it down and position it towards the front of the leaf. Then, hit CTRL + A to apply just the Scale here and not location. Right click to set the Origin to the 3D Cursor, which is the same origin location as the plant object.
Clicking on the Plant Object, go into Edit Mode, and in the Object Data Properties tab, unlock the 3 zero layers, make sure those are the only ones unlocked. Hit A in the viewport to Select All the strokes and create a new Vertex Group. Name it FRONT LEAF and assign the strokes to this group. After, go into Object Mode. Going to the Modifiers Tab, add a Hook modifier, specifying the Armature in Object and the FRONT LEAF Vertex Group. Set the Strength to 1. And now, when we move our armature, the front leaf moves with it.
To get it to subtly move, at Frame 1, hit I to Keyframe the location. Then, change the window down here to the Graph Editor. Under the X Location, add a Noise Modifier from the Side Menu - Bringing it up with N. I’ll set the Scale to 30 and Strength to .035. To get this to repeat, toggle Restrict Frame Range, and input your Start and End frames which in this case is 1 and 240 respectively. Then, for Blender In and Out, I’ll set the values to 20, which will create a smooth repeating loop. Click this icon up here to copy it, click on the Z location, and paste it by clicking this icon. Set the Offset to 20 and when we play this back, the leaf will subtly move.
Adding the Shadow

To add the Shadow, all we’ll need to do is click back on the Plant object and duplicate the 0 - Fill Layer, rename it to 0 - Shadow, placing it underneath the original Fill layer in the hierarchy. In Edit Mode, select the new strokes on the new Shadow Layer and push them back in the Y to line up approximately with the leaves underneath it. Then, in Front View, I’ll shift it in the X, to the left just a bit and down in the Z.
We’ll need to make this fill black and we can do that by either using Vertex Colors or by applying a fill material to it. However, the simplest way is to go to Adjustments, set the Tint Color to Black and Factor to 1. Then, set the Blend Mode to Multiply with an opacity of .4. To make sure it only appears on the leaves underneath it, toggle Masks and add the 2 and 3 layers. And I’m just adding the fills. Go back into Object Mode and when we play this back, the shadow appears on top of the underlying leaves while following the movement of the front leaf.
Now, in the videos, I’m drawing the shadows while the animation is playing. To do that, go into Edit Mode, select the Shadow Stroke and delete it. Go into Draw Mode, select the Draw Tool and any of the fill colors - I’ll select the Light Fill one. Make sure the drawing controls are set to 3D Cursor and Front Respectively and toggle this button, which is “Add Weight Data for New Strokes”. This will assign any newly drawn strokes to the Front Leaf Vertex Group we created. Let’s play the animation and make sure auto keying is turned off so we don’t accidentally create any new frames. Now we can draw our shadow accordingly. The shadow will seem a bit far because, according to our drawing controls, we’re using the 3D Cursor as a location reference point. To fix that, we can just go into Edit Mode and shift the stroke closer in the Y as needed.
Now, the setup we applied this on was pretty simple one, but you can experiment based on what your needs are. And I think I used this with a lattice armature rig on one of the plants. I guess the general takeaway is that there’s lots of powerful grease pencil features we can use with masks and modifiers being a few of them.
Now, if you want to learn more about those other features, you can check out my course Magic Storybook where I go over this technique and many more. In it, I’ll teach you everything you need to know to get started with grease pencil. And, in the most recent update, I focus on how to use grease pencil in a workflow that combines 3D elements. We’ll explore techniques to create vibrant 2.5D scenes that move from beyond the flat page into dimensional space. You can check it out at CGBoost.com.
Anyways, if you have any questions, feel free to leave them in the comments. Thanks again and see you guys next time!
◈ CHECK OUT MY GREASE PENCIL COURSE ◈
❚ CG Boost: https://www.cgboost.com/courses/master-grease-pencil-in-blender
◈ FIND ME ◈
❚ Instagram: http://www.instagram.com/kevandram
❚ Twitter: https://www.twitter.com/kevandram
❚ Gumroad: https://kevandram.gumroad.com
❚ Twitch: https://www.twitch.tv/kevandram
❚ TikTok: https://www.tiktok.com/@kevandram