
Creating Tarzan's Shipwrecked Treehouse Scene in Blender with Grease Pencil

Trying out a watercolor shader in Blender 3D
Hey everyone, it’s Kevin. This a scene inspired by Tarzan’s shipwrecked treehouse. Here, I was pushing a watercolor-like and painterly style in Blender 3D with Grease Pencil. I created this piece, along with 2 other Disney-themed ones, to show some of the shader setups that I like to use in my artwork.
Now, if you watched that shader video, you’ll know that I’ve been trying to achieve this specific look, procedurally for a while. At the time of making that video, I felt like I needed to create a scene that fully leaned into that aesthetic. However, that exploration became a lot more ambitious than I originally planned and I was really happy with the outcome.

Previous watercolor-like experiments in Blender 3D

Plants are great art subjects!
Now, the intention to recreate Tarzan’s treehouse wasn’t an immediate one. I’ve been considering the idea of a jungle-themed scene for months, possibly turning it into a tutorial. And the main reason for this is my love of plants. I have many of them around my place and I think they’re easy and natural subjects to replicate in art. They work well with different design aesthetics, whether rigid or loose, and you don’t have to think too much about them.

Finding the Tarzan’s Treehouse Attraction Poster for Reference
So, I thought a jungle-themed scene would work well because I could play with the density and depth of different elements. However, I was missing a central story element in the scene. That's when I thought of a treehouse. At this point, I wasn't sure how it was going to look. I roughly imagined that a group of shipwrecked explorers used parts of their ship to create this living space. I thought it would be cool to have a bow sticking out with a bowsprit and then it melding into a tree. But as I was looking through the Poster Art of Disney Parks book for Matterhorn Bobsleds poster reference, I saw the Tarzan's Treehouse attraction poster and it was very similar to what I was envisioning. So, I decided to use it as inspiration and make it a recreation.
This is one of the projects that I had a lot of fun with. There are some projects where you encounter that flow state, and you really enjoy the process. This was definitely one of them. I think this was because it was something where I could work freely yet calculated in Blender.
So, very top level, I have the base elements modeled like the tree, branches, and house structures. Then, I shaded them with a watercolor-like shader, and then used grease pencil for most of the details to complete the watercolor look. Usually, when I make these scenes, I’ll generally rely on meshes about 50%, but I’d say most of the elements here were created with grease pencil. Now, if you don’t know what grease pencil is, it’s an object within Blender that allows you to draw 2D in 3D space. This functionality makes Blender ideal for mixed workflows. And because grease pencil behaves similarly to other painting programs, you can achieve many different styles like painterly ones.
Modeling the Treehouse

Shading the Treehouse

Adding Grease Pencil Details to the Treehouse
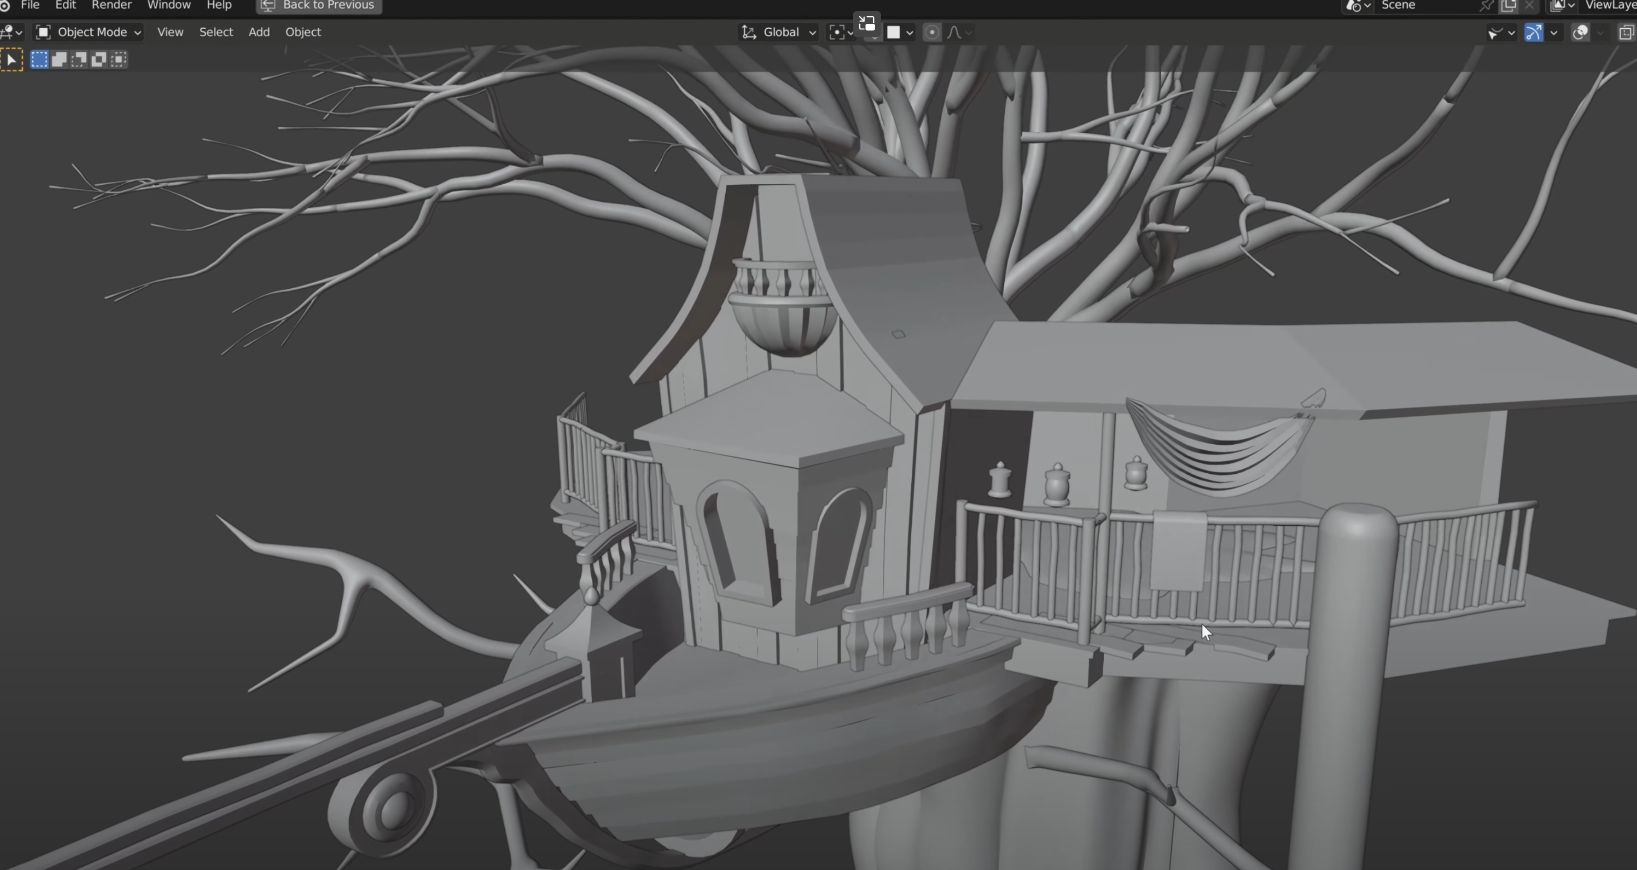
So, I began by setting up a camera and modeling. I found a reference image on Pinterest of Tarzan’s treehouse in Disneyland. And this helped me roughly model the initial structures. I started with the house and then moved on to the ship bow and bowsprit connected to it. The design of this treehouse is so interesting to me because it conveys a lot of information just by looking at it. After completing the main portion of the treehouse, I moved onto the annexed portion on the right, including the railings and support beams.
Shading the Treehouse Model
Next, I moved onto modeling the main trunk which was created using multiple cylinders with subdivision surface modifiers on them, deformed together. I added another tree behind the structure and I used the free add on Sapling Tree Gen. I added some single vertices with the Skin modifier on them to create a few more branches towards the front of the scene. Then, I moved onto shading. These elements have a watercolor-like painterly shader applied to them. If you want to learn more about that set up, you can check out my shader video. I’ll leave a link below. Here, I’m just adjusting the options and colors to my liking.

Creating grass roofs with grease pencil
After modeling and shading, I’ve moved onto working with grease pencil. I started with the straw elements on top of the roof meshes. This was accomplished by drawing strokes one at a time. To form them over the roofs, I duplicated each roof mesh and applied a solidifier modifier to increase its thickness. Then, I set my grease pencil stroke placement to Surface and drew on top of the meshes. I wanted to make it feel dense, layering different colors to look like straw. I started with the middle roof, then the top, and the one over the annexed structure. I drew a few loose pieces and used Color Attribute to Darken and Lighten certain areas as needed. Because this methods goes by vertices, it was easy to manipulate the colors slightly. Then, using the sculpting tools, I adjusted the stroke lengths and widths to add some variety.

Adding foliage to the treehouse with grease pencil
Then, I moved on to drawing the foliage with grease pencil. I relied heavily on the brushes by Daniel Martinez Lara found in the free grease pencil tools addon. To install it, you can go to Edit, Preferences, Addon, search Grease Pencil Tools, and select it from the list. Then, with your grease pencil object selected, you can go into Draw Mode, go to the Active Tool and Workspace Settings Tab, Click on the Brush Specials Dropdown, and select “Download and Import Texture Brush Pack”. Once you do that, these brushes will be appended to the default ones.
I started to think of this process as if I were painting, so I very loose with it. I selected one of the Oil Paint Brushes and added some strokes near the base of the house and the ship. I adjusted the colors of each stroke in Vertex Color Mode and the sizing and positioning in Sculpt Mode. I switched constantly between brushes, adding both abstract strokes and some that had more definition and detail, such as these palms and flowers. It was kind of relaxing to work primarily with color attribute as this process felt kind of organic. And the key here was to layer different colors and textures on top of each other.

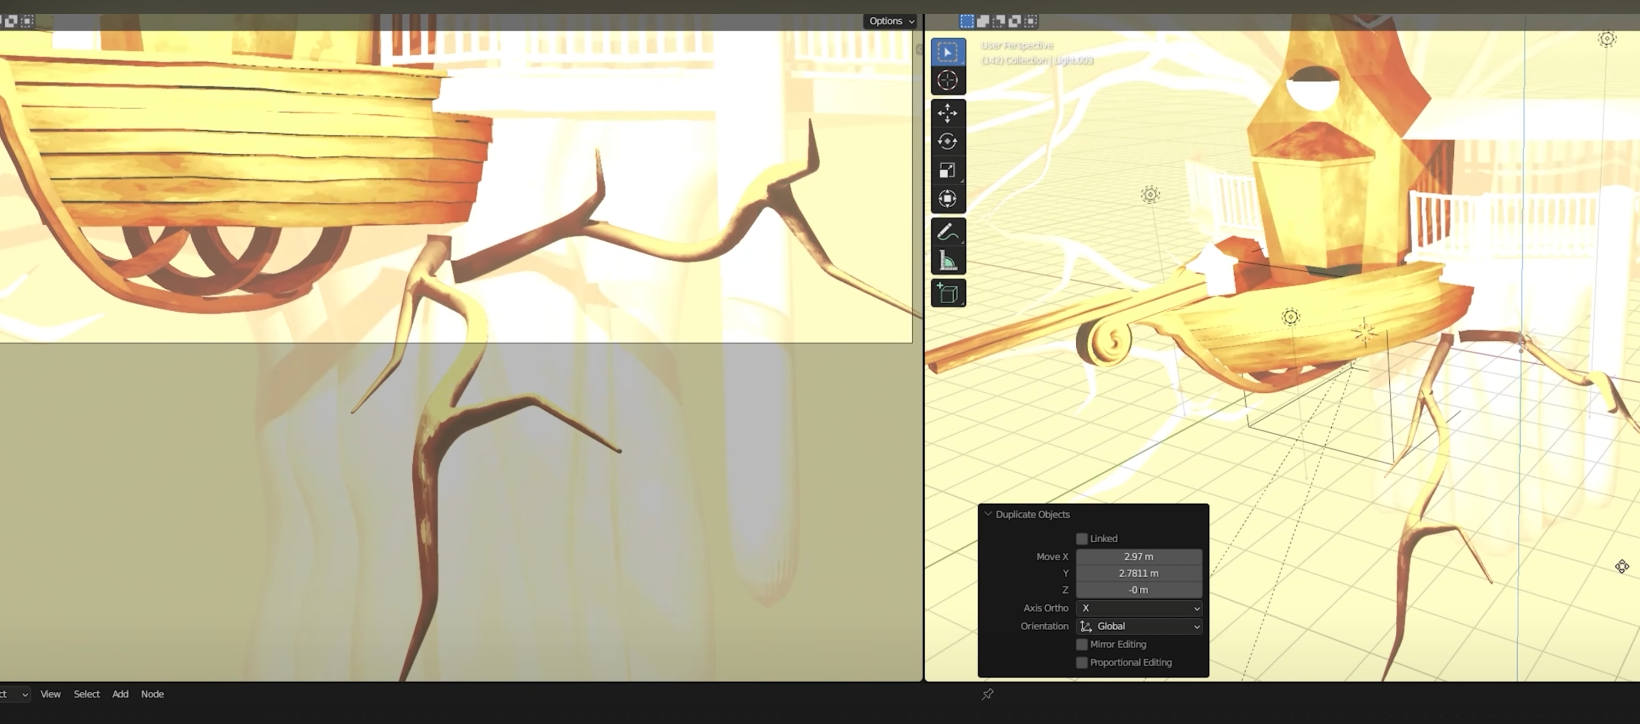
Final Tarzan’s Treehouse scene in Blender 3D with Grease Pencil
So, I just repeated this process for the right side of the piece. Again laying down some strokes, sizing and positioning in Sculpt Mode, and then adjusting their color in Vertex Color Mode. I really thought of this as a watercolor piece so I have a few random strokes and textures like these outlined plants to complement that direction. I moved to the top and then the left side of the composition, trying to make it feel dense. Afterward, I added some items within the treehouse like these lanterns and curtains. And then, I added a few more stroke details onto the ship and house and these ropes. Moving onto the environment, I added these vines and lanterns to add some color differentiation. Lastly, added a few more story elements, like a water wheel to finish it off.
And that was it for this piece. Thank you guys so much for watching I really appreciate. I really loved how this turned out and really enjoyed using grease pencil here. And if you want to learn more about Grease Pencil, you can check out my course I released with CG Boost called Master Grease Pencil in Blender! This course is accessible to those fairly new to blender. I’ll walk through how to get started with the tool so you can build a scene of your own. If you guys have any questions or comments, feel free to leave them below. Thanks again and see you guys next time!