
Creating a 2D/3D Phoenix in Blender with Grease Pencil
Hey everyone it’s Kevin. I hope you’ve all been well. It’s been a looong while, I think about 6 months, and I’ve really missed creating videos. I feel like this year flew by so quickly and I can’t believe it’s already the end of it. I was pretty busy with updating my grease pencil course and I also needed to take a break. But, I’m happy to be back and uploading to the channel again.
About
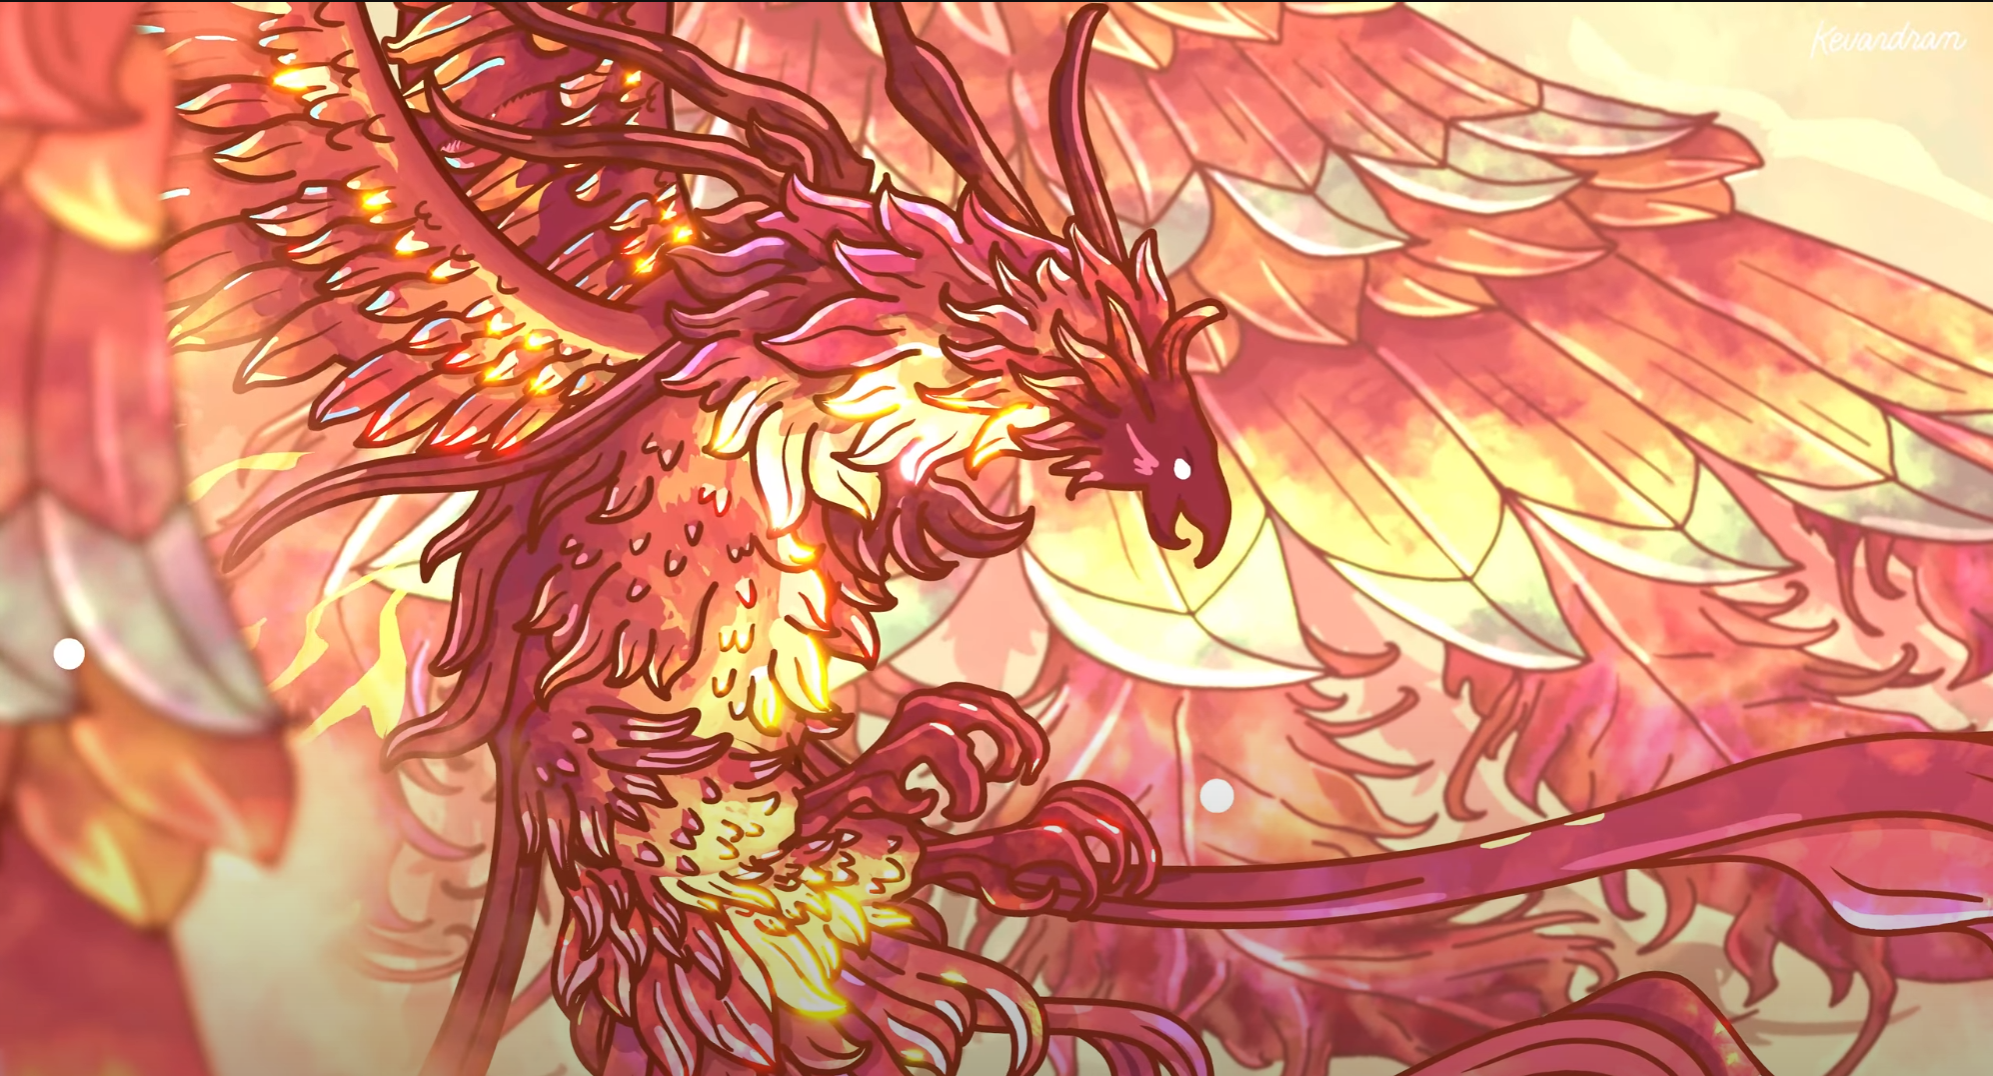
So this piece is the legendary Phoenix that I made in Blender 3D with Grease Pencil. But, this one specifically is inspired by artwork from Final Fantasy 16. If you don’t know what Final Fantasy is, it’s a long running video game series that’s been around since the 80’s and they came out with their 16th installment back in June. It’s an anthology series, so each game isn’t connected, but they have overlapping themes. This series holds a very special place in my heart because I grew up with it and love the storytelling, gameplay, and music. I actually started creating this piece back when the game was about to come out, so a few months ago, but I only got to finishing it recently.
I really liked the concept art for the game and was drawn to the Phoenix’s design especially so I thought it’d be fun to recreate something similar in 3D. So, in this video, I’m going to walk through what that process looked like.
XP Pen

Also, this video isn’t sponsored, but I wanted to shoutout XP Pen because they sent me a tablet a few months ago and I wasn’t able to make a video. But, if you guys don’t know, I’ve been using an XP Pen tablet since I started this channel in 2020. Professionally, I was using a Wacom, but at the time, I was looking for an alternative for my personal work and XP Pen seemed like a great option. To be honest, I was never really picky with my tablets as I just wanted something reliable. But this tablet has been that and more. It’s been a great tool for my workflow and all of my digital artwork. So, thank you so much XP Pen.
Intent

To start, I referenced the original artwork as inspiration. I found this piece very beautiful and honestly all of the artwork for the Eikons which in simple terms are these mythical beings in the game. The artist is Kazuya Takashi whose known for creating art for other final fantasy games. I really love his delicate yet intricate illustration style with its high contrast, soft hues, and dynamic lighting. I think his aesthetic really adds a whimsical yet subtly realistic touch to the high-fantasy environment the game is set in.
But, my goal wasn’t actually to replicate his exact piece. When I first saw the Phoenix artwork, what stood out to me was its distinct form, textures, and colors. And, after seeing it rendered in game, I noticed it contained a wide range of colors of not only reds, but blues and greens as well.
This inspired me to try pushing the stylization of what I could do in Blender with the Phoenix artwork as a starting point. Using my style, I wanted to capture the vibrancy and spectrum of colors, light effects, and textures using a 2D + 3D workflow.
Process

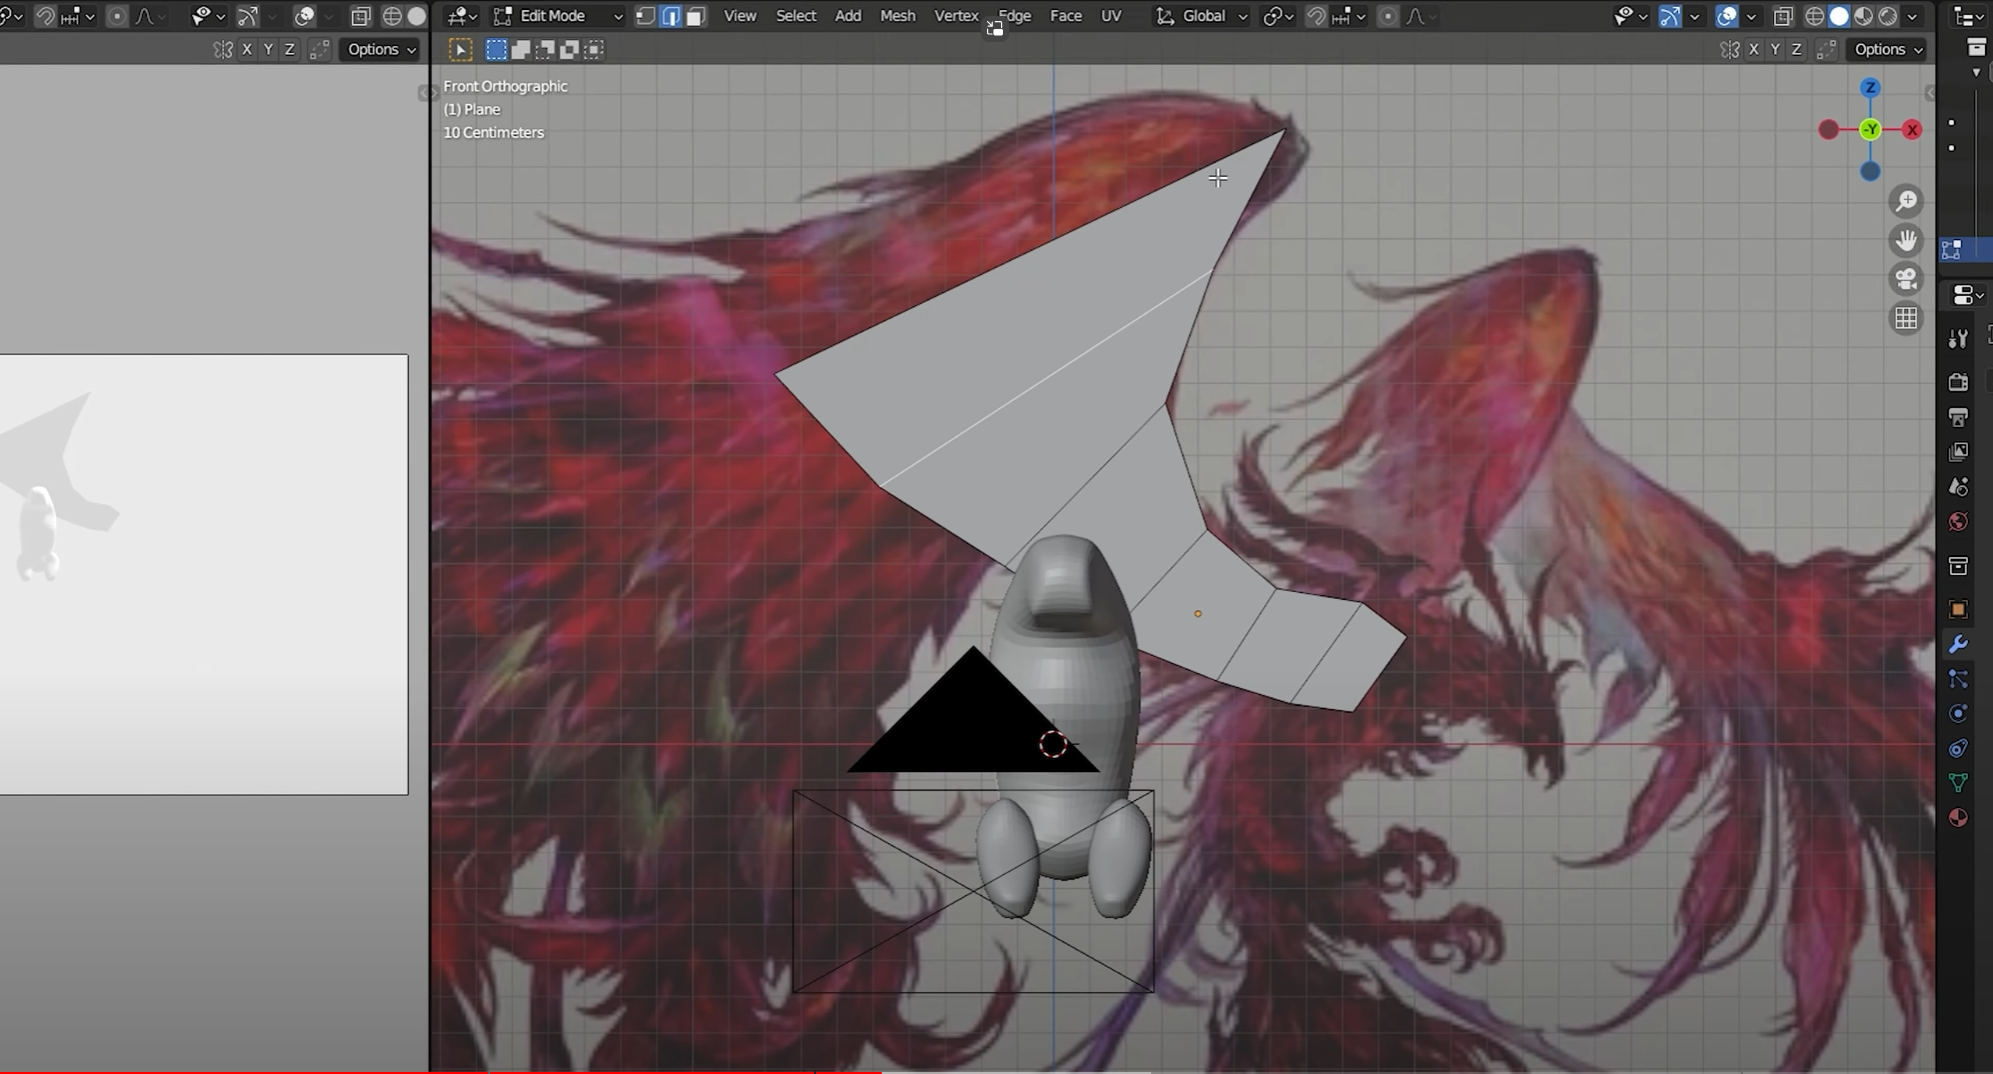
So, in a new Blender file, I started with pulling in the artwork as reference and creating some rough geometry, specifically for the parts I wanted modeled which included the body and upper wings. This was to help anchor the grease pencil work and give it some dimension, but honestly there really wasn’t much to model here.
So, once I had those elements in place, I added a textured gradient shader. This is the same one you’ll find in my Simple Stylized Shaders video and I’ll leave a link below if you wanna check that out.
After, I moved on to working with grease pencil, which makes up the majority of the elements in this scene. So, if you don’t know what grease pencil is, it’s an element in Blender that allows you to draw and animate 2D in 3D space. This makes it extremely versatile for 2D and mixed media artists to add depth to their work.

I started with blocking out the larger elements, like the wing span and the talons and went on to the smaller ones like the feathers on the body. And this is where I started to veer off the reference and take creative liberties in the direction I was going for. Moving onto the tail, I sketched it out, refined it, and then colored it with a reddish magenta as the base color. To texture it, I used the default brushes in Blender setting layers to either the Hard Light or Add blending mode. If you’d like to see another more in depth process, you can check out my Jungle Treehouse video where I have a similar workflow. I tried to incorporate many colors here using warm tones for the lighter colors and cool tones for the darker ones. I was liking the uniformity of the feathers and overall design so, I kept that consistent throughout.
I know it doesn’t look like it here, but I was able to place the strokes in differing Z space using the meshes. For the wings, I worked with linked duplicates to draw on a flat canvas.
And this is where I took an extended break. Picking it back up, there wasn’t much to finish except the wing, so I used the same process of coloring and texturing. I duplicated it for the other side and moved on to adding these cloud elements with the texture brushes. A fun effect was this moving texture within the wing. I wanted to simulate some sort of energy current and that was done with brushes and masks. I ended up with numerous layers, I think the most I’ve ever had in a grease pencil project and it started to become hard to navigate. I know at some point, they’re planning on implementing a layer management system and I definitely think it would’ve been helpful here.
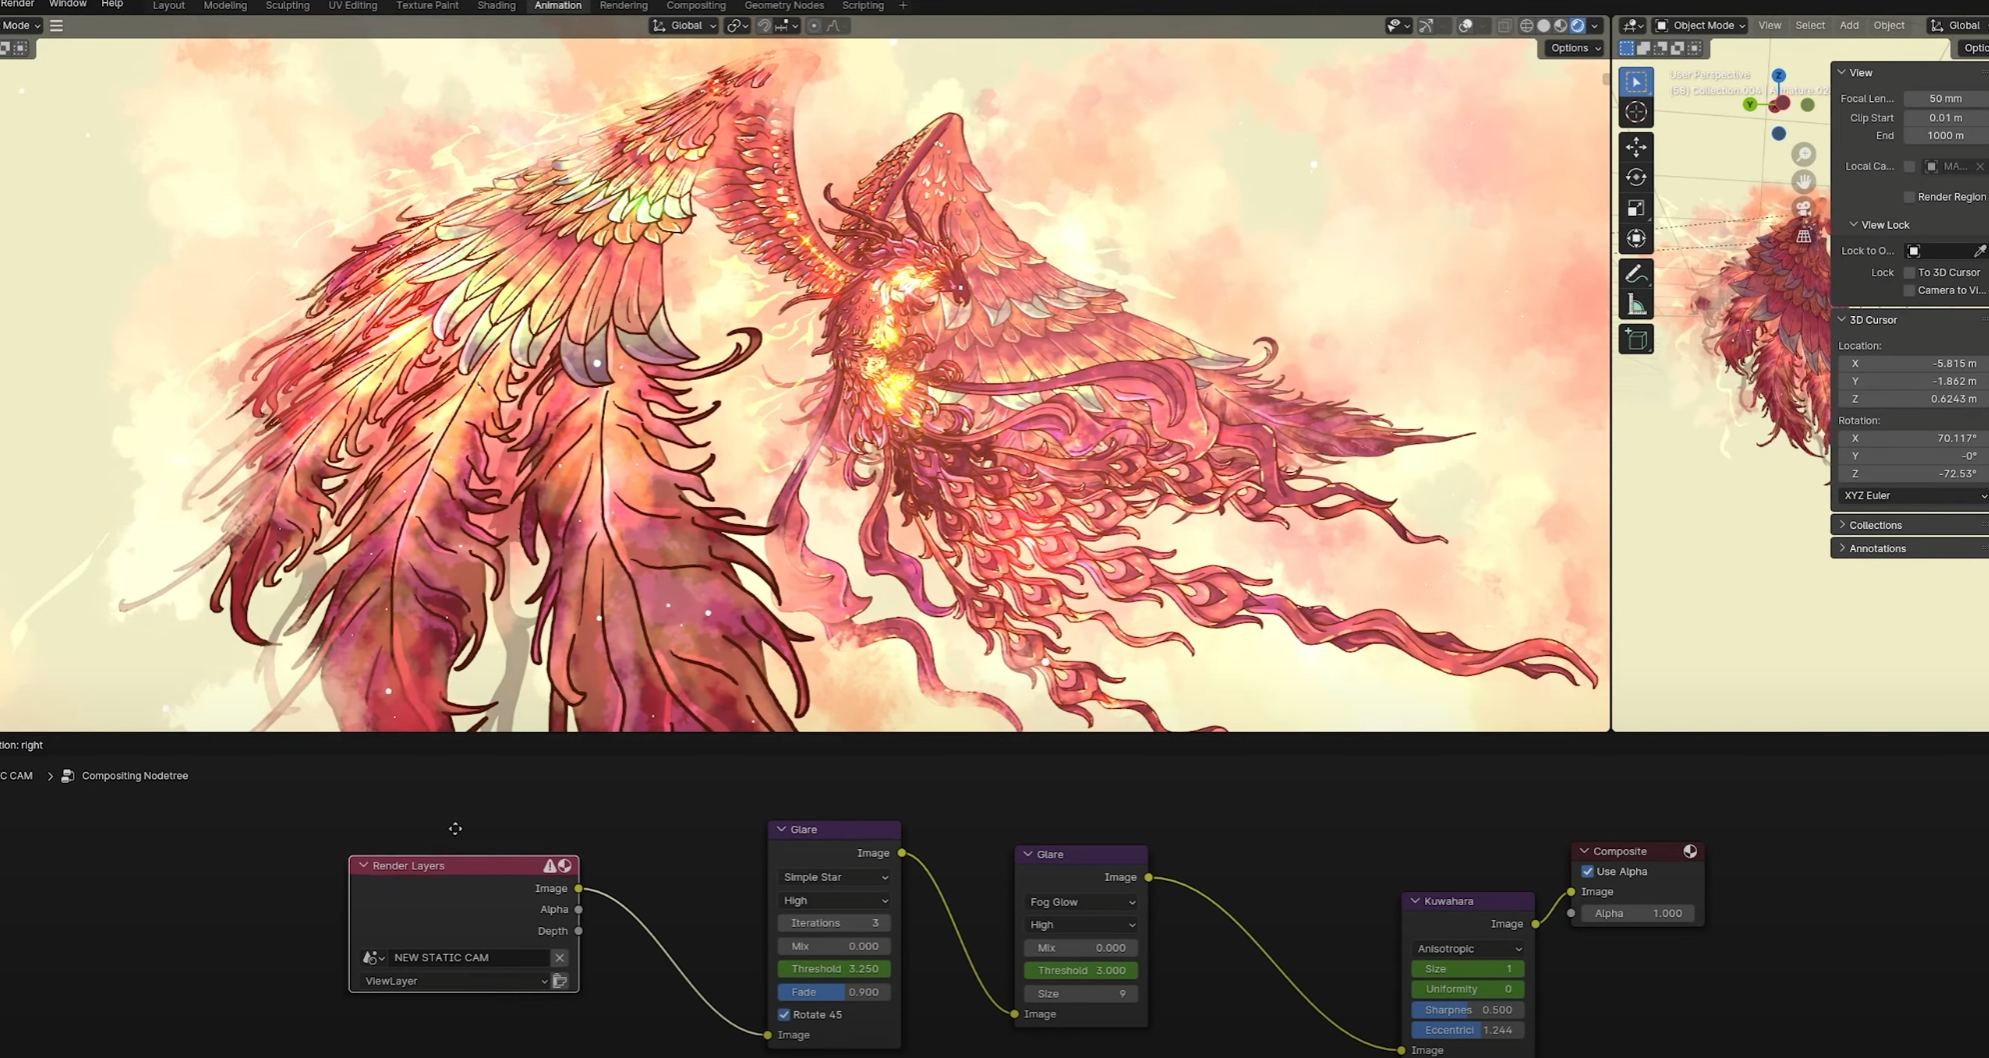
After I was done, I rigged it with a lattice armature rig to animate it flying and give it some movement. For compositing, I added some Glare nodes and tried the new Kuwahara filter. So, this filter was just implemented recently in Blender 4.0 and it applies a watercolor-like effect to your scenes. I didn’t want to apply this to this entire piece so instead I used it as a transition effect in combination with glare. And moving forward, I think it could be helpful in my workflow for backgrounds. After rendering, I noticed some of the shots looked a bit monochromatic, so I ended up adding a subtle gradient map in After Effects to lift the color. And that was it for the Phoenix piece.
Thank you so much for watching, I really appreciate it.
If you want to learn more about my workflow with grease pencil, you can check out my course Magic Storybook. In it, I teach you everything you need to know to get started with it. And, in the most recent update, I focus on how to use grease pencil in a workflow that combines 3D elements. We’ll explore techniques to create vibrant 2.5D scenes that move from beyond the flat page into dimensional space.
Don’t worry if you’re not a drawing pro or are new to 3D - this course is totally beginner friendly. There’s over 10 hours of content, downloadable project files, and access to help anytime you need it. You can check it out on CGBOOST.com. If you’ve already enrolled, thank you so much. This has been a project I’ve been working on for a while and I’m so grateful for the support.
Anyways, I’ll see you in the next video soon!
◈ CHECK OUT MY GREASE PENCIL COURSE ◈
❚ CG Boost: https://www.cgboost.com/courses/master-grease-pencil-in-blender
◈ FIND ME ◈
❚ Instagram: http://www.instagram.com/kevandram
❚ Twitter: https://www.twitter.com/kevandram
❚ Gumroad: https://kevandram.gumroad.com
❚ Twitch: https://www.twitch.tv/kevandram
❚ TikTok: https://www.tiktok.com/@kevandram